

Nearly 40% of people who use arm braces experience reduced effectiveness simply because they’re wearing them incorrectly. This shocking statistic reveals a widespread problem that could be easily avoided with proper knowledge and technique.
Learning how to wear an arm brace correctly can mean the difference between finding real relief and wasting time with ineffective treatment. Whether you’re dealing with tennis elbow, carpal tunnel syndrome, or recovering from an arm injury, proper brace application is crucial for maximizing benefits and preventing further complications.
This comprehensive guide walks through everything needed to achieve optimal brace fit, placement, and usage. From selecting the right size to avoiding common mistakes, these evidence-based techniques will help transform an arm brace from a frustrating accessory into an effective tool for pain relief and recovery.
Key Takeaways
• Proper sizing and placement are critical – measure your arm accurately and position the brace to target the specific problem area
• Snug but not restrictive fit provides optimal support without compromising circulation or causing discomfort
• Regular adjustments throughout the day ensure continued effectiveness and prevent slipping or bunching
• Avoid common mistakes like wearing too tightly, incorrect placement, or using the wrong brace type for your condition
• Combine brace use with breaks and other treatments for best results without creating dependency
Why Proper Fit and Placement Matter
Getting the fit and placement right isn’t just about comfort – it’s about effectiveness. An improperly worn arm brace can actually do more harm than good, creating pressure points, restricting blood flow, or failing to provide adequate support where it’s needed most.
Ensures Targeted Support ✅
When positioned correctly, an arm brace delivers compression and stability exactly where the injury or condition requires it. For conditions like tennis elbow, even a few millimeters off in placement can significantly reduce the brace’s ability to relieve tendon stress.
Prevents Secondary Issues 🛡️
Incorrect placement can create new problems. A brace that’s too tight may cause nerve compression, while one that’s too loose provides no benefit and may even increase injury risk by creating a false sense of security.
Maximizes Comfort for Extended Wear 💪
Many arm conditions require extended brace use throughout the day. Proper fit ensures the brace remains comfortable during long periods, preventing skin irritation, muscle fatigue, and the urge to remove it prematurely.
Improves Treatment Outcomes 📈
Studies show that patients who wear their braces correctly experience faster recovery times and better pain management compared to those with improper fit. The difference can be substantial – often reducing healing time by weeks.
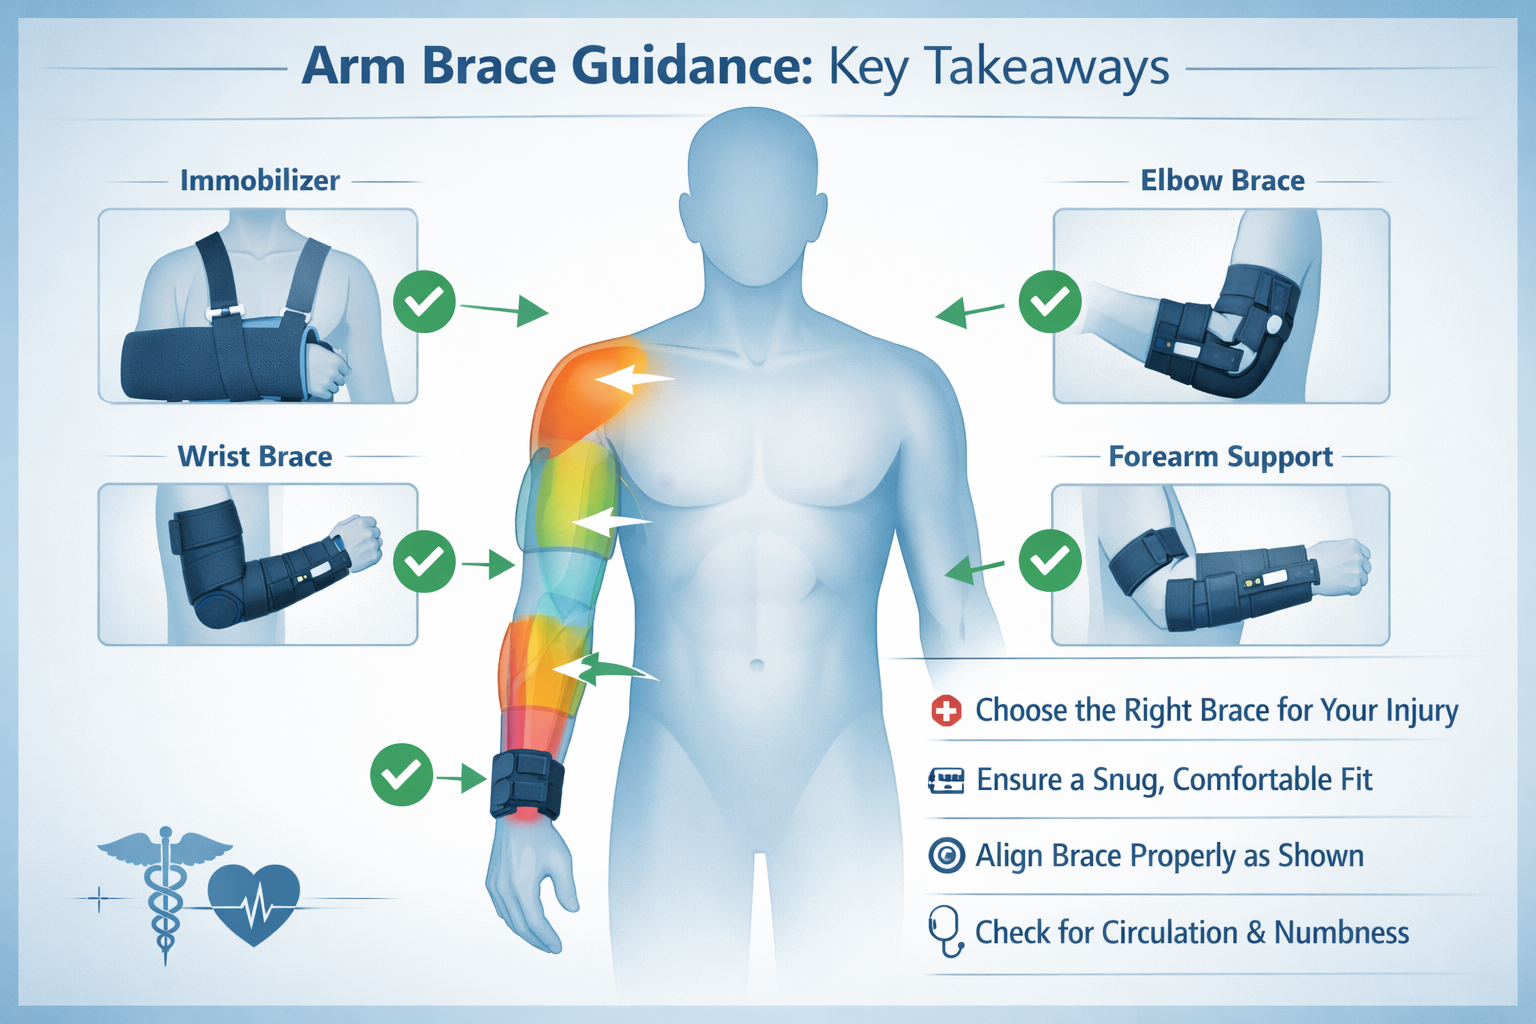
Types of Arm Braces and How They Differ
Understanding the different types of arm braces helps ensure you’re not only wearing your brace correctly but also using the right type for your specific condition.
Compression Sleeves
These provide full-arm coverage with graduated compression. They’re ideal for general arm fatigue, mild swelling, or conditions affecting larger areas of the arm. The key to wearing compression sleeves correctly is ensuring even distribution without bunching.
Elbow Straps (Counterforce Braces)
Designed for targeted tendon support, these focus pressure on specific points to relieve stress on tendons. Popular for tennis elbow and golfer’s elbow, proper placement is critical – typically 1-2 inches below the elbow joint.
Wraparound Braces
Offering adjustable support levels, these braces use straps or velcro for customizable compression. They’re versatile but require careful attention to strap tension and alignment to avoid uneven pressure distribution.
Immobilization Braces
These restrict movement to protect healing tissues. Often prescribed post-surgery or for severe injuries, they require precise positioning to maintain proper joint alignment while preventing harmful motion.
Pro Tip: Different brace types require slightly different wearing techniques. Always consult the manufacturer’s instructions specific to your brace model, as placement can vary even within the same category.
For those dealing with work-related arm strain, consider exploring specialized options like arm braces designed for workplace use that offer features tailored to occupational demands.
Step-by-Step: How to Wear an Arm Brace Correctly
Following these detailed steps ensures optimal brace performance and comfort. Take time with each step – rushing the process often leads to improper fit and reduced effectiveness.
Step 1: Choose the Right Size 📏
Measure Your Arm Accurately
- Use a flexible measuring tape
- Measure the circumference at the widest part of your forearm
- For elbow braces, measure around the elbow joint when slightly bent
- Take measurements when arm swelling is minimal (typically morning)
Follow Sizing Guidelines
Most manufacturers provide sizing charts, but these general guidelines apply:
- Small: 8-10 inches circumference
- Medium: 10-12 inches circumference
- Large: 12-14 inches circumference
- X-Large: 14+ inches circumference
Avoid Common Sizing Mistakes
❌ Don’t guess your size based on clothing
❌ Don’t choose a smaller size thinking it will provide more support
❌ Don’t ignore swelling when measuring
Step 2: Position the Brace Properly 🎯
Align with the Affected Area
The brace should center over the problem area. For tennis elbow, position the pressure pad over the lateral epicondyle (bony prominence on the outside of the elbow).
Specific Positioning by Type:
- Elbow Straps: 1-2 inches below the elbow crease
- Compression Sleeves: Center the highest compression zone over the joint
- Wraparound Braces: Align support elements with anatomical landmarks
Check Anatomical Alignment
Ensure the brace follows your arm’s natural contours. It shouldn’t twist, bunch, or create gaps against the skin.
Step 3: Secure the Brace 🔒
Fasten Straps Evenly
If your brace has multiple straps, secure them in order from bottom to top, maintaining consistent tension across all attachment points.
Ensure Balanced Compression
The pressure should feel uniform around the circumference of your arm. Uneven tightening can create pressure points and reduce effectiveness.
Double-Check Alignment
After securing, verify the brace hasn’t shifted during fastening. Readjust if necessary before moving to the next step.
Step 4: Adjust for Comfort ✨
Test Range of Motion
Move your arm through normal daily activities:
- Bend and straighten your elbow
- Rotate your wrist
- Lift your arm overhead (if appropriate for your condition)
Check for Slipping or Bunching
The brace should stay in position during movement. If it slides or bunches up, it’s either too loose or incorrectly positioned.
Fine-Tune Tension
Make small adjustments to achieve the sweet spot between support and comfort. This may take several attempts to get right.
Step 5: Check Circulation 🩸
Monitor for Warning Signs
Watch for these indicators of restricted blood flow:
- Tingling or numbness
- Skin color changes (pale, blue, or red)
- Increased swelling below the brace
- Cold fingers or hand
Perform the Finger Test
Press on your fingernail until it turns white, then release. Color should return within 2-3 seconds. Slower return may indicate circulation issues.
Make Immediate Adjustments
If circulation problems occur, loosen the brace immediately. It’s better to have slightly less support than to risk circulation complications.
How Tight Should an Arm Brace Be?
Finding the right tension is crucial for effectiveness and safety. The goal is snug support without restriction – tight enough to provide stability but loose enough to maintain healthy circulation.
The Goldilocks Principle
Too Tight Signs: 🚨
- Numbness or tingling in fingers
- Skin indentations that persist after removal
- Increased pain or discomfort
- Difficulty moving fingers normally
- Skin color changes
Too Loose Signs: ⚠️
- Brace slides during normal movement
- No noticeable support or stability
- Gaps between brace and skin
- Lack of pain relief during activities
Just Right Indicators: ✅
- Comfortable pressure sensation
- Maintains position during activity
- Allows normal finger movement and sensation
- Provides noticeable support without pain
- Can slide one finger under the brace edge
Professional Fitting Tips
Many healthcare providers use the “one finger rule” – you should be able to slide one finger comfortably under the edge of the brace. This ensures adequate compression without over-tightening.
For those with conditions like tendonitis, proper tension is especially important. Learn more about selecting the right brace for tendonitis to ensure you’re getting appropriate support levels.
When to Wear an Arm Brace
Timing your brace use correctly maximizes benefits while preventing over-dependence. Different conditions and activities require different wearing schedules.
Activity-Based Usage 🏃♂️
During High-Risk Activities
- Computer work or repetitive tasks
- Sports participation
- Heavy lifting or manual labor
- Activities that previously triggered symptoms
Preventive Wearing
Some people benefit from wearing braces during activities that historically cause problems, even before symptoms appear.
Recovery-Based Usage 🏥
Acute Injury Phase
During the first few days after injury, continuous wear may be recommended, including during sleep (with medical approval).
Healing Phase
As healing progresses, usage typically transitions to activity-specific wear, allowing the arm to strengthen naturally during low-risk periods.
Chronic Condition Management
For ongoing conditions like arthritis or chronic tendonitis, strategic use during flare-ups or high-demand activities often provides the best balance.
Sleep Considerations 😴
Whether to wear an arm brace during sleep depends on your specific condition. Some injuries benefit from nighttime immobilization, while others heal better with natural movement. Similar principles apply to other joint braces – for example, nighttime knee brace use follows comparable guidelines.
For those dealing with chronic pain conditions, arm braces specifically designed for chronic pain relief may offer features that make extended wear more comfortable.
How Long Should You Wear an Arm Brace?
Duration of brace use varies significantly based on your condition, activity level, and treatment goals. Understanding appropriate timing prevents both under-treatment and over-dependence.
Short-Term vs. Long-Term Use ⏰
Acute Injuries (Days to Weeks)
- Initial injury: May require continuous wear for 3-7 days
- Healing phase: Gradual reduction to activity-specific use
- Recovery phase: Intermittent use during high-risk activities
Chronic Conditions (Ongoing Management)
- Flare-up periods: Increased usage during symptom episodes
- Maintenance phase: Strategic use during triggering activities
- Long-term management: Focus on strengthening to reduce dependence
Daily Wearing Guidelines 📅
Maximum Continuous Wear
Most experts recommend no more than 8-12 hours of continuous wear without breaks, unless specifically prescribed for immobilization.
Break Intervals
Take 15-30 minute breaks every few hours to:
- Allow skin to breathe
- Check for irritation or pressure marks
- Perform gentle range-of-motion exercises
- Assess ongoing need for support
Weekly Assessment
Regularly evaluate whether you still need the brace:
- Are symptoms improving?
- Can you perform activities without it?
- Is pain decreasing during unbraced periods?
Avoiding Over-Dependence 🎯
Gradual Weaning Process
As symptoms improve, progressively reduce brace use:
- Remove during low-risk activities first
- Gradually increase unbraced time
- Reserve use for high-demand situations
- Eventually eliminate routine use
Strength Maintenance
Combine brace use with exercises to maintain muscle strength and prevent weakness from prolonged support dependence.
For workers who need extended daily use, arm braces designed for overuse injuries often include features that make longer wearing periods more sustainable.

|
|

|
|
Our Rating:
4.5
|
Our Rating:
4.4
|
Our Rating:
4.9
|
|
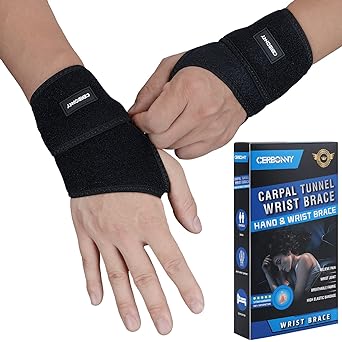
Description: A removable wrist splint and two fixed plastic splints provide a high level of wrist support. Limits unconscious bending or twisting of the wrist during sleep, avoiding aggravation of inflammation or nerve compression due to improper posture |
Description: Wrist bracers can be adjusted according to their comfort level, our wrist band can ensure stability, not easy to fall off, wearing it our hand support is very comfortable. High quality soft breathable fabric, |
Description: Maximum Pain Relief: Our wrist support braces are designed to help you relieve the pain and get the support you need for all-day and all-night comfort. Commonly used by people suffering from carpal tunnel syndrome, tendinitis, arthritis, wrist sprains, strains, etc. |
|
$13.99
|
$15.95
|
$27.06
|
A removable wrist splint and two fixed plastic splints provide a high level of wrist support. Limits unconscious bending or twisting of the wrist during sleep, avoiding aggravation of inflammation or nerve compression due to improper posture
Wrist bracers can be adjusted according to their comfort level, our wrist band can ensure stability, not easy to fall off, wearing it our hand support is very comfortable. High quality soft breathable fabric,
Maximum Pain Relief: Our wrist support braces are designed to help you relieve the pain and get the support you need for all-day and all-night comfort. Commonly used by people suffering from carpal tunnel syndrome, tendinitis, arthritis, wrist sprains, strains, etc.
Common Mistakes to Avoid
Learning from others’ mistakes can save time, discomfort, and treatment setbacks. These frequent errors can significantly reduce brace effectiveness or even cause harm.
Fitting and Positioning Errors ❌
Wearing Too Tightly
Many people believe tighter equals better support. This misconception leads to:
- Circulation problems
- Increased swelling
- Nerve compression
- Skin breakdown
- Reduced compliance due to discomfort
Incorrect Placement
Even small positioning errors can render a brace ineffective:
- Tennis elbow braces placed too high or low miss the target area
- Compression sleeves twisted during application create uneven pressure
- Wraparound braces with misaligned support elements provide no benefit
Wrong Brace Type Selection
Using an inappropriate brace type for your condition:
- Compression sleeves for conditions requiring targeted pressure
- Immobilization braces for conditions needing controlled movement
- Generic braces for specific medical conditions
Usage Pattern Mistakes 🔄
All-Day Wearing Without Breaks
Continuous use without breaks can cause:
- Skin maceration and breakdown
- Muscle weakness from disuse
- Psychological dependence
- Reduced treatment effectiveness over time
Ignoring Warning Signs
Continuing to wear a brace despite:
- Increasing pain or discomfort
- Skin irritation or breakdown
- Numbness or tingling
- Worsening of original symptoms
Premature Discontinuation
Stopping brace use too early because:
- Initial symptom improvement creates false confidence
- Discomfort from improper fit rather than addressing fit issues
- Impatience with healing timeline
Maintenance Neglect 🧼
Poor Hygiene
Failing to keep the brace clean leads to:
- Skin infections
- Unpleasant odors
- Material degradation
- Reduced wearing compliance
Ignoring Wear and Tear
Continuing to use braces with:
- Stretched-out elastic components
- Broken or worn fasteners
- Compressed padding that no longer provides support
- Frayed edges that cause skin irritation
Tips for Maximum Comfort and Effectiveness
These proven strategies help optimize your brace-wearing experience, ensuring both comfort and therapeutic benefit throughout your treatment period.
Skin Care and Hygiene 🧴
Pre-Application Preparation
- Clean and thoroughly dry the skin before applying the brace
- Apply a thin layer of barrier cream if you have sensitive skin
- Ensure no lotions or oils that might cause slipping
- Check for cuts, rashes, or irritation that might worsen with brace use
Daily Maintenance Routine
- Remove the brace at least once daily for skin inspection
- Wash the area with mild soap and water
- Allow skin to air dry completely before reapplication
- Rotate between two braces if possible to allow thorough cleaning
Brace Care and Maintenance 🛠️
Cleaning Guidelines
- Hand wash with mild detergent in cool water
- Air dry completely – avoid direct heat or sunlight
- Clean velcro fasteners with a small brush to remove lint
- Replace worn components before they affect function
Storage Best Practices
- Store in a clean, dry location
- Avoid folding or compressing padding elements
- Keep away from extreme temperatures
- Maintain shape by storing flat or on a form
Optimization Strategies 💡
Gradual Break-In Period
Start with shorter wearing periods and gradually increase:
- Day 1-2: 2-3 hours with frequent checks
- Day 3-5: 4-6 hours with regular breaks
- Week 2+: Full intended duration as tolerated
Activity-Specific Adjustments
Fine-tune brace settings for different activities:
- Tighter during high-demand tasks
- Looser during rest periods
- Different positioning for various movements
Complementary Treatments
Combine brace use with other therapies:
- Gentle stretching exercises during brace-free periods
- Ice or heat therapy as appropriate
- Anti-inflammatory medications as prescribed
- Physical therapy exercises to address underlying causes
Environmental Considerations 🌡️
Temperature Management
- Choose breathable materials for hot weather
- Layer appropriately in cold conditions
- Consider moisture-wicking fabrics for active use
- Adjust tension as temperature changes affect swelling
Clothing Compatibility
- Select clothing that accommodates the brace without binding
- Avoid tight sleeves that compress the brace
- Consider the order of dressing to minimize brace displacement
- Choose fabrics that won’t catch on brace components
For those dealing with inflammation-related conditions, specialized arm braces for inflammation may offer additional comfort features during flare-ups.
When to Seek Medical Advice
Recognizing when professional guidance is needed prevents complications and ensures optimal treatment outcomes. Don’t hesitate to consult healthcare providers when these situations arise.
Immediate Medical Attention Required 🚨
Circulation Emergencies
Seek immediate care if you experience:
- Severe numbness or complete loss of sensation
- Fingers or hand turning blue or white
- Severe swelling that doesn’t respond to brace loosening
- Complete inability to move fingers normally
Worsening Symptoms
Contact your healthcare provider promptly for:
- Significant increase in pain despite proper brace use
- New symptoms that weren’t present before bracing
- Signs of infection (redness, warmth, discharge)
- Allergic reactions to brace materials
Routine Consultation Needs 📋
Fit and Function Assessment
Schedule appointments when:
- Unsure about proper brace positioning
- Experiencing persistent discomfort despite adjustments
- Brace effectiveness seems to be decreasing
- Ready to transition to different support levels
Treatment Progress Evaluation
Regular check-ins help ensure:
- Healing is progressing as expected
- Brace use remains appropriate for current condition
- Adjustments to treatment plan as needed
- Prevention of over-dependence on bracing
Professional Fitting Services 👩⚕️
When to Consider Professional Fitting
- Complex or severe conditions requiring precise support
- Previous unsuccessful attempts with over-the-counter options
- Unusual anatomy or sizing requirements
- Multiple failed braces or persistent problems
What to Expect
Professional fitters typically:
- Assess your specific condition and needs
- Take precise measurements and evaluate fit
- Provide detailed wearing instructions
- Schedule follow-up appointments for adjustments
Similar to how proper knee brace fitting requires attention to detail, understanding how knee braces should fit demonstrates the importance of professional guidance for optimal joint support.
Frequently Asked Questions
Can you wear an arm brace all day?
While some conditions may require extended wear, most arm braces shouldn’t be worn continuously for more than 8-12 hours without breaks. Extended wear can lead to skin problems, muscle weakness, and circulation issues. Take regular breaks to allow skin to breathe and maintain normal arm function.
Should an arm brace be worn over or under clothing?
Direct skin contact is typically recommended for most arm braces to ensure proper grip and compression. However, if you experience skin irritation, a thin, smooth layer like a compression shirt sleeve can be worn underneath. Avoid thick or textured fabrics that may interfere with brace function.
How do you know if your brace fits correctly?
A properly fitted brace should:
- Feel snug but not tight
- Stay in position during normal movement
- Allow you to slide one finger under the edge
- Provide noticeable support without causing pain
- Maintain normal finger sensation and movement
If you experience numbness, excessive pressure marks, or the brace slides around, the fit needs adjustment.
Can wearing a brace incorrectly cause harm?
Yes, improper brace use can cause several problems:
- Nerve compression leading to numbness or tingling
- Circulation restriction causing swelling or tissue damage
- Pressure sores from uneven contact points
- Muscle weakness from over-dependence
- Worsening of the original condition due to inadequate support
Should I wear my arm brace while sleeping?
Sleep use depends on your specific condition. Acute injuries may benefit from nighttime immobilization, while chronic conditions often heal better with natural movement during rest. Consult your healthcare provider for guidance specific to your situation.
How often should I clean my arm brace?
Clean your brace at least every 2-3 days with regular use, or daily if you’re very active or prone to sweating. Hand wash with mild soap and cool water, then air dry completely. Having two braces allows you to rotate them for continuous use while one is being cleaned.
When should I replace my arm brace?
Replace your brace when:
- Elastic components lose their stretch
- Fasteners no longer hold securely
- Padding becomes compressed or worn
- Material shows signs of cracking or tearing
- It no longer provides adequate support
Most braces last 3-6 months with regular use, though this varies based on quality and usage intensity.
For those experiencing specific types of arm discomfort, arm braces designed for soreness may offer targeted relief features.
Conclusion
Learning how to wear an arm brace correctly transforms this simple device from a basic accessory into a powerful tool for pain relief and recovery. The difference between proper and improper use can mean weeks of additional healing time, unnecessary discomfort, or even complications that set back your progress.
The key principles remain consistent across all brace types: accurate sizing, proper positioning, appropriate tension, and regular monitoring. Take time to measure correctly, position the brace to target your specific problem area, maintain snug but not restrictive compression, and watch for warning signs that indicate adjustments are needed.
Remember that brace use is typically most effective when combined with other treatments like appropriate rest, gentle exercises, and professional medical guidance. Don’t rely solely on bracing – address underlying causes and work toward reducing dependence as your condition improves.
Your next steps:
- Assess your current brace fit using the guidelines in this article
- Make necessary adjustments to positioning and tension
- Establish a routine for regular breaks and skin care
- Monitor your progress and adjust usage as symptoms improve
- Consult a healthcare provider if you experience persistent problems or aren’t seeing expected improvement
With proper application and realistic expectations, an arm brace can significantly improve your comfort and support your recovery journey. Take the time to get it right – your arm will thank you for the attention to detail.